Spring Cleaning Checklist

Spring Cleaning Checklist

Spring is here! The weather is gorgeous and it’s time to open the windows and start that spring cleaning. But where to start? What needs to be done? If you’re not sure exactly what needs to be cleaned, we’ve got the checklist just for you.

Throughout the House

  • Vacuum/Wipe Down Walls and Ceilings: Start by vacuuming to remove as much loose dirt and dust as possible. Follow this with a soft cloth. Wash with water and soap mixture to clean really dirty areas.
  • Furniture: Vacuum and clean upholstered items and polish wooden items. Clean all dust and treat any problem areas (tears, knicks/scratches, rust spots, loose parts, etc.)
  • Dust: Choose a quality duster that will trap and remove the dust (ex: microfiber cloth) rather than just spread it around. Dust all surfaces of your home including shelves, knick knacks, photos, lamp shades, door trim, window casings and ceiling fans.
  • Air Vents: Clean these yourself or have them professionally cleaned.
  • Vacuum: Vacuum everywhere including all floors and other areas that can quickly be dusted/cleaned with vacuum attachments.
  • Shampoo Carpets and Rugs: Pretreat stained areas and then clean the entire area with a quality rug steam cleaner. If you have valuable/antique rugs, consult a professional before cleaning.
  • Windows: Clean the windows inside and out. Grab a friend or spouse to help make the job go quicker.
  • Baseboards: Dust and wipe down baseboards.
  • Drapes/Blinds/Window Treatments: Clean the drapes and blinds. If heavy winter drapes are used, remove, clean and store them. Replace with lighter warm weather window treatments.

Kitchen

  • Defrost and clean out the freezer: For more info, see our guide How to Clean a Freezer.
  • Refrigerator Coils: Pull out the refrigerator and clean the coils. Be sure to unplug the refrigerator first to avoid any shocks. The coils are usually at the bottom under the grill or in the back. Simply vacuum away any dust or dirt build up with a vacuum with attachments.
  • Oil Wooden Cabinets: Keep your wooden cabinets looking great by applying a thin layer of citrus oil. Use a soft cloth to apply and a clean cloth to remove any excess oil from the surface.
  • Trash Cans: Wash out and sanitize your trash cans to keep them smelling fresh during the winter months.
  • Oven/Stove Cleaning: In addition to cleaning the inside of the oven, look at the exhaust vents. Clean the grease traps and vents as well. Pull the oven out and clean behind the unit to remove excess dust and debris that has dropped/dripped down over the months.
  • Drains: Remove build up and odor causing growth with a quality drain cleaner. There are also a variety of chemical free options, such as baking soda and vinegar.

Bathrooms:

  • Check Expirations Dates: Sort through cosmetics and prescriptions and discard all expired products.
  • Check Grout in Tile: The grout in tile can wear and become poroused. Regrout areas that are weak or damaged.

Bed Rooms

  • Flip the Mattress: To keep even wear on your mattress, it’s wise to flip it periodically. Spring cleaning is the perfect time!
  • Change the Bedding: Now that warmer temperatures are here, remove the flannel sheets and heavy blankets, wash them and store them. Replace them with lighter, warm weather bedding.
  • Pillows: With use, pillows can house bacteria and mold. If your pillows are machine washable, wash them and dry them completely. If they’re not washable, hand clean them or replace them with new ones.
  • Clean out Drawers and Closets: Add the discard and donate items to your items from the attic/basement and set a delivery date. Store cold weather clothing and bring out warm weather clothing.
  • Smoke Detectors/Alarms: Replace batteries in all smoke detector units.

Home Office

  • Organize Files: Use this time to check policy dates and get rid of excess paperwork. Scan and store important documents on your computer to save space.
  • Book Shelves: Clean them off and dust and/or wipe them down.

Garage

  • Outdoor Trash Cans: Wash out and disinfect trash cans to keep odors and pests away.
  • Furnace Filters: Time to replace or clean the filter for your furnace. This is also important to keep your furnace running efficiently.

Basement/Attic

  • Minimize: Sort through boxes of stored items and clothing. Donate, sell or trash items as appropriate.
  • Sort and Organize: Use bins or boxes to keep like items together in an organized fashion so you can find them easily.
  • Safety: Keep all appliances raised up off the floor to prevent any electrical problems should there be water in the basement.

Outdoors

  • Light Fixtures: Check for burnt out bulbs, broken fixtures or damaged wires. Replace and repair as needed.
  • Outdoor Furniture: Bring your outdoor furniture out of storage and clean it well so it’s ready for that first spring BBQ.
  • Walkways: Clean all decks and walkways to remove any mildew that may have developed.
  • Porch: Sweep away any cobwebs or nests. Wash down the walls.
  • Siding: Clean any areas of the siding that are weathered or stained.

Laundry Room

  • Washing Machine: Clean out your washing machine.
  • Dryer: Vacuum out the lint trap of the dryer and clean the vents and exhaust as well.

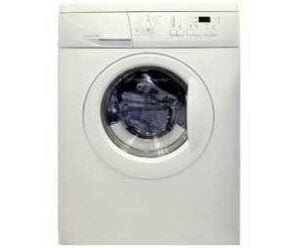
How to Clean Dingy Whites in a Front Load Washing Machine

Libby asked: I have a front loading washing machine and cannot get my whites white. When replaced with new whites, within 2-3 washings, they are just as grey and dingy. I only use HE detergents and have tried different brands, hot water and adding bleach, all to no avail. Help!

With the trend toward front loading washers comes an unfortunate truth:  clothes need water to come clean, and lots of it. Front load washers use a relatively small amount of water and as such, it has become apparent that dingy whites are a side effect of these types of machines. Moreover, a return of grayed fabrics to their former bright white glory isn’t likely to happen. There are, however, a few steps you can take to keep whites looking their best.

  • Don’t mix colors. Only wash whites with other whites.
  • Don’t overload the machine. The fewer items in the load, the more likely they are to get clean.
  • Use the hottest possible water suitable for your load.
  • Consider pre-soaking whites in Oxi Clean or a similar oxygenated detergent.

My Newly Cleaned Oven is Smoking

Anna asked: My clean oven smokes. What am I doing wrong? I sprayed my oven with oven cleaner and washed it all off, but it smokes out the house when I turn it on. What can I do about this?

There are a couple of reasons that your oven may be smoking. The first is that there is still food or grease that remains on the surface or on the heating unit. When the oven is turned on, this is burning and causing the smoke. The second is that there is residue from the cleaning product left behind on the surfaces. In either case, the best way to fix it is to give the oven a thorough cleaning/rinsing to remove any remaining food or cleaning residue from the surfaces. It is normal for a light amount of smoke to occur when you first use your oven after cleaning, but it should stop quickly. If the smoke is heavy, turn the oven off immediately, allow it to cool completely and reclean and/or rinse it again. For complete oven cleaning instructions, see our guide How to Clean the Oven.

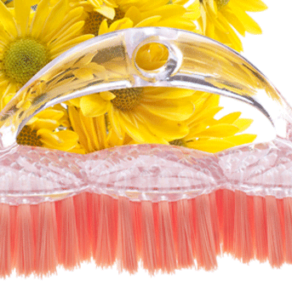
How to Protect Hands from Washing Dishes

Lauren asked: How do I protect my hands while washing dishes? I got a supplemental part time job in the school kitchen, and I was dishes a lot. Although I use rubber gloves, mu hands are very cracked. How can I protect them? I even tried using some Vaseline before I put on the gloves, but it does not help. Mu hands are burning. Thank you for your information.

Hot water and frequent washings can cause painful cracking and raw skin on hands. Hand washing may be unavoidable, but you can take a few steps to prevent the worst effects of repeated hot water exposure if you keep these tips in mind. The key is to treat skin all day long, not just before or after dish washing.

You Will Need:

  • Fragrance Free Moisturizer
  • Long, heavy duty dish gloves

Steps to Protect Hands:

  1. Use a fragrance-free moisturizer as soon as you wake up in the morning. Wait about five minutes after your initial application and reapply. Dry hands absorb moisture remarkably fast.
  2. When you wash your hands, dry thoroughly and reapply moisturizer.
  3. When washing dishes, use long, heavy duty dish gloves. Thicker, longer gloves reduce the opportunity for water to find a way into the gloves and irritate skin.
  4. If possible, avoid exposure to extremely hot water.
  5. For extra moisturizing, apply a thick layer of lotion and wear gloves overnight. Use breathable knit gloves so your hands will not sweat, as moisture from sweating can further irritate skin.

Additional Tips and Advice

  • If redness and cracking do not improve within a few days, you might need to see a physician. Dry, cracked skin is prone to infection.
  • Avoid hand sanitizers with alcohol in them. The alcohol is more drying than washing with soap and water.
  • Use a moisturizing soap for hand washing.

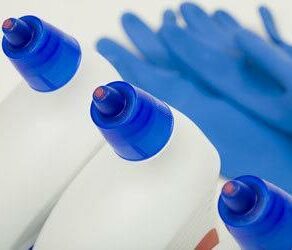
How to Avoid Health Problems from Chlorine Bleach

Pat asked: Could cleaning with bleach cause throat irritation? I use bleach as a regular component of my house cleaning routine. I use it in the bathrooms, toilets, floors, etc. I am concerned that I may be irritating my throat. After a heavy duty winter cleaning episode last weekend, I awoke with a sore throat and strained voice. This seems to happen after a seasonal cleaning. I’m trying to figure out if it may be the result of a chemical allergy or irritant.

Although widely used as a household cleaner, chlorine bleach is hazardous in many ways. Some of the first effects of breathing the fumes are throat and lung irritation, problems that are much more dangerous in persons with heart conditions, respiratory issues, or who are predisposed to breathing problems. Physical contact can cause damage to skin, eyes, and membranes. Long term exposure may lead to chronic conditions, while mixing chlorine bleach with any other cleaning product could have devastating or lethal results. If you find you have a consistent physical reaction to bleach, you should discontinue using it immediately and contact a physician.

How to Remove Damage from Toilet Bowl Cleaner on Granite

Florance asked: How do I fix damage from toilet bowl cleaner? Toilet bowl cleaner containing hydrochloric acid was spilled on dark granite and resulted in a spot that is lighter than the rest of the counter, almost a bleaching effect. Is there anything I can do to darken it?

Once granite has been “etched” by acid, the damage cannot be repaired. A professional may be able to refinish or “rehone” the granite, but there’s nothing you can do to restore the spot on your own. We recommend finding a reputable pro by contacting either the installer or manufacturer.

Will the Delicate Cycle Clean a Heavily Soiled Item?

Bryan asked: Does the delicate setting on the washing machine make clothing really clean? It is easy to say, “wash delicate clothing with delicate setting.” However, if the delicate clothing is as dirty as the stuff washed with “Medium” setting, which setting should be used to wash this delicate clothing? Does the “Delicate” setting really make clothing as clean as being washed with the “Medium” setting?


The delicate cycle is designed to provide a wash cycle that uses less agitation and a shorter washing time. While the other settings use more agitation and longer washing times, which is needed to get them clean, delicate items are made from fabrics and materials that often cannot tolerate it. Most delicate items are not as soiled as more durable fabrics, such as work clothing, and are cleaned appropriately with this shorter, gentler cycle.

When you are working with a very soiled, delicate piece of clothing, there are a couple of options. First, presoak the piece to allow the soil to become wet and loosen the bond to the fabric. Use a stain pre-treatment as necessary. Ensure that the stain treatment is safe for the delicate fabric type. Wash the garment using the delicate cycle. If needed, wash the piece a second time to remove the rest of the soiled areas. Using a mild detergent is also important for cleaning delicate items. Do not dry the item in a heated dryer until it is clean. Some delicate items require line drying or laying the piece flat on a clean towel.

Another option is to hand wash the item. This will allow you to target the soiled areas specifically to ensure the dirt is removed. Again, use a mild detergent and hang or lay flat to dry.

Good luck!

Does a Bleach Residue Remain on Clothing Fibers?

Joanne asked: My grandson and I are having a “discussion” on how long bleach and soap remain in clothes. I say if you rinse properly, there is no problem. He says in his science studies that the bleach stays in forever. Please advise if this is correct. He says you can never remove all of the bleach from clothes. Help.

According to our research, bleach will not remain on clothing that is properly rinsed. We have found no studies or proof that bleach remains in clothing fibers after washing and rinsing completely. By rinsing the piece in clean water, and plenty of it, the bleach should be washed away completely. If a large amount of bleach was added to the load, additional rinse cycles may be necessary to remove it completely. If not rinsed completely, a residue will remain. This residue can remain on the clothing, in the washing machine and the dryer. A heavily loaded washing machine won’t rinse clothing well, and high efficiency machines that use little water also tend to leave residue behind. It can be removed by washing/rinsing the item/machine again.

Sodium hydroxide, a part of household bleach, is what weakens the fibers if not rinsed completely. This can be neutralized by adding vinegar to the rinse water or washing a second time with no bleach to remove any residue that remains. Still, over time, clothing treated with bleach tends to break down faster, and the result is visible with worn, torn, or ripped fabrics. This result stems from both regular and color safe bleaches.

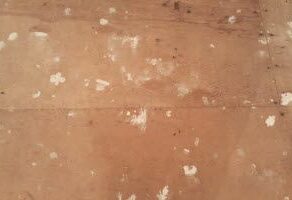
Will Wet Carpet Damage the Parquet Floor Underneath?

E asked: A toilet flooded into a room that is carpeted with old parquet underneath. The carpet isn’t glued to the parquet, so I raised it and placed items underneath to allow air to circulate under it and over the floor. I mopped up all the water I possibly could. Now, the floor appears to be mostly dry, but there are areas where the wet carpet is still touching it. Will there be any damage to the floor? I don’t know what sort of material is underneath the parquet. I’m worried because I rent this place.

Parquet is made of wood, and when wood floors get wet, they can become damaged. There are two major concerns in this situation: warping and mold. While there is a coating on the flooring, it cannot withstand large amounts of water. After mopping up excess water, bring in fans and dehumidifiers to help remove the moisture quickly. Moving air will dry the surfaces faster. Once the surface is dry, continue to run the fans and expose the floor to open air to allow any water that has soaked into the cracks to evaporate. While there may not be enough water to swell and warp the wood, there is enough moisture for mold to grow. If you cover the flooring with the carpet too soon, it provides the perfect dark, damp conditions for mold and mildew. If the carpet is not glued down and can be removed from the house completely, that would be the best plan. Take it outside for a day or two and keep the fans going inside. This will give the floor a chance to dry and the carpet can be brought back in once it’s dry. If the floor shows no damage, it will not likely warp or swell after the moisture is removed. However, always keep an eye out for mold and mildew growth. This will appear as black spots and growth in the cracks between the flooring pieces. Treat any mold immediately with a mild bleach and water solution.

What Is Dry Cleaning Solvent?

Faith asked: What is “dry cleaning solvent”? I have never heard of it. Can I just use dish soap, and what temperature should the water be? I have some spots of ink toner on the carpet and have already vacuumed over them. Now I need to use something to remove their marks. I have heard that ink toner is very sensitive to water, and my husband’s shirts have holds in them where the toner “burned” them clean through! I don’t want this to happen to the carpet, as we rent.


Dry cleaning solvent is a fluid that is used to clean a fabric or textile surface without water. It is used for removing toner because of the toner’s sensitivity to water. If water is added to the toner, it will increase the stain and lessen your chances of successfully removing it. Because of this, you cannot substitute dish soap for dry cleaning solvent. This solvent is applied to the surface, following the instructions on the label. Once the area is clean, the solvent will evaporate. There is no need to use water during the cleaning process. These products can be found online and in the laundry aisle.

Some popular dry cleaning solvents you may want to consider include: