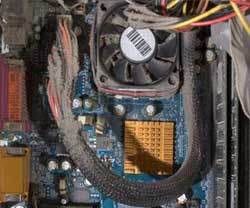
Even if your computer doesn’t look dirty, the inside may be clogged with dust – preventing air hot air from venting and causing your computer to slowly overheat. It’s a quick and easy cleaning job to remedy the problem. And while you’re cleaning the inside of the machine, you may as well clean the case as well.
Before you start cleaning the computer, be sure to turn it off and unplug it from the wall or power strip. And unplug any accessories from the CPU, such as the keyboard, mouse, printer and monitor, as well as the power cord. Also, ground yourself by touching something made of metal before you begin working with the inside of the machine. This should take care of any static electricity which could zap your computer’s insides.
Cleaning the Computer Case
The first step to cleaning the computer’s case is to remove the cover from the computer. There should be specific instructions in your owner’s manual on how to do this. Most likely you only have to remove a couple screws and lift it off. (Be sure to put the screws in a safe place so you don’t lose them.) While you’re checking the owner’s manual, see if there are any directions or warnings on how to clean or, more importantly, how not to clean your machine. And keep them in mind as you move forward.
Once you’ve removed the cover from the computer, you can clean the cover using a cotton rag, an old t-shirt or any other cloth that is not going to shed fuzz on your CPU. (For example, do not use a kitchen towel or tissue). Just spray the cloth, not the case itself, with an electronics cleaning spray or dampen it with lukewarm tap water. Make sure the cloth doesn’t get dripping wet, since any pooled water in the crevices could damage your machine. If it’s too wet, wring it out in the sink.
Gently rub the case with the cloth until you’ve gotten off all of the dust and debris. Make sure to clean both sides of it and the top and bottom. Then let it air dry or dry it with a clean cloth.
Note: If there’s something on your computer’s case besides normal dirt and dust, such as ink from a permanent marker, use the search bar at the top of this page to find cleaning instructions for the type of material that has the mark on it.
Cleaning the Computer’s Guts
Obviously you don’t want to spray the inside of your computer with the cleaner or with water, unless you’re interested in starting an electrical fire. What you want to do is use a can of compressed air, such as Dust-Off, which is available at most electronics stores. Read the safety warnings on the can before you start to avoid damaging your machine – or yourself, for that matter. The chemicals in the can can be dangerous if touched or inhaled.
If your computer is especially dusty or you are prone to allergies you may want to put on a dust mask to protect your lungs before continuing with this cleaning job. There’s no telling exactly where the dust will end up as you blow it out.
When you clean the inside of the computer, you should try not to move or dislodge any wires or connectors, especially if you’re not familiar with what they’re for and how to reattach them properly. Also, be especially careful not to touch the motherboard or your computer may be cleaned of more than just dust. The easiest way to prevent damage is to not touch anything inside your machine, either with your hands or with the nozzle from the compressed air can – but especially with your hands.
Just hold the can of compressed air at least six inches away from the machine (it is pretty powerful, so you don’t want to be any closer). Make sure the can is mostly upright so the liquid doesn’t spill out and push the button on the top of it. Don’t press the button continuously. Instead send a small puff into each of the dusty areas. Follow the instructions on the can as to how to best dislodge the dust.
If any dust remains after completing this task, you can gently brush it away with a small toothbrush (a child-size brush with soft bristles) or a paintbrush (think watercolor size, not wall size). Try to touch the computer with only the bristles of the brush, not with the handle.
If you feel comfortable enough doing it, you can also remove any external memory cards or drives and shoot a bit of compressed air into their slots. Don’t forget to put them back when you’re finished.
And while you’ve got your compressed air out …
You can use it to get the gunk out from in between the keys in the keyboard and in any tiny crevices in your monitor and mouse, and even in the cracks in your windowsill for that matter. It is a rather versatile tool.
Reassemble the computer
Once you’ve successfully cleaned the case and the inside of the machine, it’s time to put the cover back on the computer. Before you do this, make sure all of the cables and components are in the right place and nothing has been moved or dislodged. (If you didn’t touch anything, this shouldn’t be a problem.) Also, make sure the case is completely dry, especially the inside of it.
Keeping your Computer Clean
No matter what you do, your computer will end up getting dusty inside eventually. To prevent it from happening as quickly, keep your work area clean and wipe down the outside of the case about once every two weeks, or more often if you work in a particularly dusty area, such as if there is construction going on in your building.


This is a great time to check any parts of your computer that require thermal grease/paste. That stuff will eventually evaporate or wear out and need to be replaced. This is especially important on processors.
Also, make sure you discharge if you decide to touch any part of the inside of the computer. You can do this by touching any grounded metal object, such as a water tap, or the metal stripping under the corners of walls. You can also get static control wristbands if you’re going to do some heavy duty cleaning and reassembling.
Check all the fans on your computer and use compressed air to blow out any buildup there.
And make sure you don’t blow the dust back toward the computer, blow away from it. You’d be surprised how often people don’t think about this.
The same things apply to cleaning out the inside of game consoles! (Which you should also do once the warranty expires.)