
Dress asked: How do I clean olive oil that burned on the bottom of a large metal saucepan. An oil fire left a thin, black film, very like enamel paint, on the bottom of the pan. I tried oven cleaner, but it did nothing. Comet takes it off a little bit. Clorox did nothing.
Burnt on oil can attach itself to the pan in a permanent fashion. While it is possible to remove the oil, it will take time and effort. Prepare your work space with an area to soak the pan, a well ventilated area to work and plenty of clean water to wash and rinse it afterwards. Then get ready to tackle that nasty burnt on stain!
Baking Soda Method
You Will Need:
- Baking soda
- Water
- Scrubbing pad (SOS Pads work well)
Steps to Clean the Burnt Oil:
- Mix water and baking soda to make a paste.
- Spread the paste over the affected area and scrub with a scrubbing pad.
- Allow it to set until dry.
- Wash with soap and water and scrub it away.
Dishwasher Detergent Method
Do not use this method on a teflon-coated pan. Soaking the piece in dishwasher detergent will ruin the coating and leave the pan useless.
You Will Need:
- Dishwasher detergent
- Water
- Large tub or basin
- Scrubbing pad
Steps to Clean the Burnt Oil:
- Fill the tub or basin with hot water.
- Add a good amount of dishwasher detergent.
- Place the pan into the mixture and allow it to soak overnight.
- Scrub with a scrubbing pad the following day.
- Rinse thoroughly to remove all traces of the soap.
Chemical Cleaners
You Will Need:
- Cleanser (pick one):
- Bar Keeper’s Friend
- Greased Lightening
- Oven cleaner
- Scrubbing pads (SOS pads or Brillo pads)
- Water
- Dish detergent
- Rubber gloves
- Goggles
Steps to Clean the Burnt Oil:
- There are many commercial products available that contain chemicals that will cut through the burnt on oil. Select one from the list above, or browse the cleaning aisles for additional options.
- Since these cleaners contain harsh chemicals, protect your hands and eyes with gloves and goggles. Work in a well ventilated area (outdoors is best).
- Apply the cleaning product to the surface of the burnt area.
- Scrub the area with a scrubbing pad.
- Allow the cleaner to remain on the surface for several hours to overnight.
- Scrub again with a scrubbing pad.
- Continue adding additional cleaner as needed and scrubbing/soaking.
- Once the burnt on grease is removed, clean the pan thoroughly with dish soap and water. Remove all traces of the chemical cleaners.
- Rinse the piece completely and allow it to dry.
Additional Tips and Advice
- Mr. Clean Magic Erasers are effective in removing tough, burnt-on stains. After the film is loosened with the above methods, the eraser will work well to scrub it away.
- Vinegar is another acid that is environmentally friendly. Allow the affected area to soak overnight in the vinegar and scrub the following day. Mix it with dishwasher detergent for extra cleaning power.
- If the pan is non-stick and coated with Teflon, extra caution will need to be taken. Soaking the piece in dishwasher detergent will ruin the coating and leave the pan useless.Regardless of what option you choose, remember that it will take time for the product to work through the affected area. Allowing the burnt area to soak overnight will help. At a minimum, it needs to soak for 4-5 hours.


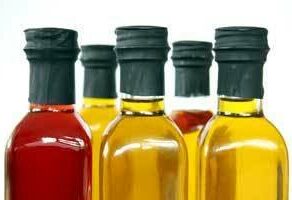

How do you clean glass kitchen oil bottles (olive oil, sunflower oil, etc.) Thanks.
Baking soda and scrubbing pads are TERRIBLE ways to clean pans! This will just scratch the heck out of the pans–which looks awful and also makes them much more prone to sticking later.
Do NOT use abrasives on your cookware!
I used Bar Keepers Friend, a sponge and balled up tin foil, and my stainless steel pan came out looking just like new! I wouldn’t be able to do this on a non-stick pan, but I was very happy with the results!
I’m here because I want to salvage my beloved nonstick ceramic pan, but if you have burnt oil on a non-stick pan, you’re basically out of luck. Most how-to articles seem to focus on stainless and since we can’t scrape the heck out of our non-stick pans, there isn’t much option. I would recommend you continue to use it the proper way and see how much mileage you’ll get out of it. Let the stain be your friendly reminder on how badly you screwed up and see how long you can maintain it that way. When it is time to retire it, treat your new replacement with the care and experience you have from your old ones. Use the following tips and you’ll save yourself hours of elbow grease and frustration. It is better to spend the extra time and effort to prevent burnt on oil then the hours wasted on removing it.
1. Do NOT high heat. If you must, use cast iron instead or be extremely careful, but be prepare to pay for your mistake again. 🙂
2. Wipe the oil off the side of your pan immediately. Once it drips to the side and you put it back on the flame, it is over! Pour out whatever you’re cooking and wipe it clean and continue with your cooking. Takes less than a minute to do.
My pan is stainless and you can not use abrasives on it. The burnt oil is on the outside of the pan…on the bottom and up the side. Any suggestions?
Steel wool pads from the dollar store!
I just used oven cleaner with the cool directions and it worked great; there were some spots that were really bad, so I put a paste of Bar Keepers Friend on them.
I tried most of the above and nothing worked!!! Finally threw the stainless fry pan out.
If the pan is a 12″ All-Clad skillet that would cost $150 to replace; throwing it out is not a great option. I just used Goo Gone and a plastic pad, similar to ScotchBrite.
I have these beautiful cream Martha Stewart pots. My husband ruined the two frying pans with burnt on grease. Any idea how to remove it?!?
I have an 8-qt stainless pot that I use to make popcorn. It acquired a lot of burned-on oil on the bottom and sides, and I wanted to use it to make a stew. To clean it, I put in 4″ of cool water and 2 drops of dishwashing detergent. I put the burner on medium-high and brought it to a boil. I lowered the temp to medium and let it boil for 15 minutes. I took it to the sink and used a Scotch Bright pad gently for 20 seconds. Most of the grime was gone. I repeated the process and it was clean. The popcorn smell was gone too.
I had oil in a stainless pot, deep frying. A decent amount of oil boiled over, ran down the sides, spilled on to the glass-top burner, and burst into flames. So after I finished cooking, the bottom and sides of the pot looked like it had a lacquer finish. I used Bar Keeper’s Friend. I am a true believer now. It still took a while, but BKF did most of the work, compared to my arm.
I have an expensive ceramic-coated pan with burned on oil I had forgotten about since I last used it – I assumed it could be cleaned with hot water and dishwashing liquid…NO. I also tried soaking it in vinegar and baking soda, but did not scrub…nothing seems to work. I don’t want to scrub it and worry about chemicals destroying the ceramic coating. Any ideas? I would like to save the pan.
Stgeorge,
For ceramic coated pans, it is usually best to avoid metal utensils, which includes steel wool scrubbers. Instead, try using a loofa scrubber, nylon scrubber, or a plastic scraper. (A credit card or plastic spatula can work as a plastic scraper.) Using your fingernails to scrape off the residue can also work. However, if nothing else is working, you may just need to try lightly using an S.O.S. pad and hope for the best.
What about the copper skillets and pans? It’s not the inside of them that the burnt grease is stuck on but the outside and bottoms. What can I use that will disolve the cooked on grease without scratching and damaging the outsides and undersides of the cookware? These are Copper Chef and Red Copper brands.
Traci,
You can use oil to freshen the cooked on grease so that it can be removed more easily. Simply spread some cooking oil or baby oil over the grease stains, then continue rubbing the oil in/over the stains until the buildup is removed. It may help to let the oil sit for 30-60 minutes to fully penetrate the buildup, then rub the area clean. You are right that copper can be easily scratched and should not be cleaned with S.O.S. or other steel wool pads. If you need another cleaner to help cut through the remaining grease, use some white vinegar or use Bar Keepers Friend on a soft cloth or sponge. Also, be sure to wear gloves throughout the cleaning of your copper items. Good luck!
Source: HowToCleanStuff – How to Remove Grease Buildup from Stainless Steel
Source: HowToCleanStuff – How to Clean Copper Cookware
That’s wrong. Red Copper and Copper Chef are not true copper pans. They are ceramic coatings over aluminum. There may or may not be some copper in the coating, but that is immaterial. Treat these as ceramic-coated, not as copper.
Thanks Fred! Great catch! You’re right, those pans are ceramic or a mix of ceramic and copper. According to the Red Copper website, those are “non-stick ceramic cookware made of ultra-tough Copper” and the Copper Chef website says their fry pan has a “Cerami-Tech Non-Stick Outer Coating.” Luckily, cleaning for copper and ceramic is much the same: no abrasives like steel wool, you can use oil to dissolve the buildup, etc. However, here is a guide specifically for How to Clean Non-stick Pans with more ideas. Thanks again!
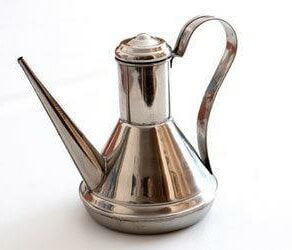
I just cleaned Mom’s shiny, stainless steel tea kettle, which had baked-on grease or oil for a long time. I thought it was a loss, but I first tried using regular liquid dish soap, which removed surface grease and dirt only, then I coated the baked-on stuff with with goo remover, and left that on for a while. Not much of the baked-on stuff came off, but it did loosen it some because icame off where I scratched it with my fingernail. That method would have take a year to remove the baked-on oil! I filled up the kettle with hot water, put on the lid, filled the sink with extremely hot water, added two dishwasher bubbles, and let the kettle soak for about 20 minutes. I used a special glass cleaning sponge first and then a sponge with a plastic non-scratch backing to buff off the severely stuck baked oil. It took some scrubbing, but it worked! My kettle is shiny and clean! Thank you for the tips!