Helen asked: How do I remove plaster from floor tiles? I recently had my home dry lined, and the plaster from the walls has stained many of my floor tiles. I have scrubbed and scrubbed. When it is wet, I think it is gone, but when it dries off, it seems to be ingrained. Is there anything that can dissolve it?
Plaster is water soluble and should clean up easily, even if it dries first. If signs of it remain, the texture of your tile may be to blame. Take the following steps and you should see an improvement.
You Will Need:
- Hot water
- Mild dish soap
- Wash cloths
- Bucket
- Denture brush
- Clean towels
Steps to Remove the Stain:
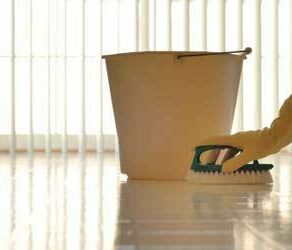
- Fill the bucket with warm water.
- Add enough detergent to get a mild, sudsy solution.
- Submerge the washcloth(s) in the water.
- Wipe the stained portion of the floor with a washcloth, leaving generous amounts of water on the tile. Work in small sections if necessary.
- Allow the hot sudsy water to remain in place for at least five minutes, then begin to scrub with the denture brush. A denture brush has short, sturdy bristles with superior scrubbing power for textured areas, making it ideal for this job.
- Wipe dry with a towel.
- Repeat if necessary.
Additional Tips and Advice
- If you’re not seeing a marked improvement, let the water soak onto the floor for a longer period of time, overnight, if possible. The key to getting rid of the plaster is to let the moisture penetrate and soften every trace of it, and this can be difficult even with minor texture on tile.
- Large chunks of plaster should be easy to chip off. Use a plastic windshield scraper for best results with the least amount of risk to the floor.
- If your tile is not sealed or coated, contact the manufacturer for advice before proceeding.


Tile the walls first. Go to the hardware store. Tell them what you are doing. Get the right adhesive for the job. Get the right size notched trowel. How are you going to cut them? Rent a wet tile saw. Get plastic tile spacers if needed. Measure the surface to be tiled. Find the center and snap a chalk line for both measured centers – length and width. You will now have an ‘X marks the spot’ directly in the center of the room with the lines extending the entire length and width of the room. These are your guide lines. You will place your first tile in the 90 degree corner of the X and just follow the line on down. Do the other straight line of the X the same way. Now you have your corner stones for doing the rest of the area. Do sections in an order that you can back out of the room as you tile so you don’t get stuck.
What about if you have bluestone tiles?
Pauline,
Whenever you are unsure if a cleaning solution is safe for your specific item, test it in a small hidden area first to look for any adverse reaction. Luckily, this solution is mild, so it should be safe for bluestone tiles. It’s always best to test first just in case though. Good luck!
Source: DoItYourself – How to Maintain a Bluestone Paver Patio