• Skip to main content
  • Skip to primary sidebar
  • Skip to footer
go to homepage

Search by
Category
  • Cleaning Blog
  • Automotive
  • Bathroom Appliances and Fixtures
  • Carpets and Rugs
  • Cats
  • Closets and Organization
  • Dogs
  • Electronics
  • Fabrics
  • Floor & Carpet
  • Floors
  • Food
  • Furniture
  • General Housecleaning
  • House
  • Household Appliances and Fixtures
  • Jewelry
  • Kitchen Appliances and Fixtures
  • Kitchen and Bathroom Surfaces
  • Kitchenware
  • Metals
  • Outdoors
  • Other Pets, Animals and Pests
  • People
  • Stain Removal
  • Stuff
  • Surfaces
  • Things You Own
  • Tools and Techniques
  • Walls and Ceilings
  • Windows
  • Everything Else
  • Ask us your cleaning question

go to homepage

How To Clean Stuff.net

Search by
Category
  • Cleaning Blog
  • Automotive
  • Bathroom Appliances and Fixtures
  • Carpets and Rugs
  • Cats
  • Closets and Organization
  • Dogs
  • Electronics
  • Fabrics
  • Floor & Carpet
  • Floors
  • Food
  • Furniture
  • General Housecleaning
  • House
  • Household Appliances and Fixtures
  • Jewelry
  • Kitchen Appliances and Fixtures
  • Kitchen and Bathroom Surfaces
  • Kitchenware
  • Metals
  • Outdoors
  • Other Pets, Animals and Pests
  • People
  • Stain Removal
  • Stuff
  • Surfaces
  • Things You Own
  • Tools and Techniques
  • Walls and Ceilings
  • Windows
  • Everything Else
  • Ask us your cleaning question

Home / Cleaning Guides / Things You Own / Electronics / How to Clean a Harmony One Remote Control

How to Clean a Harmony One Remote Control

Table of Contents:
  1. You Will Need
  2. Steps to Clean the Remote

Otto asked: How do I clean the keys on a Logitech Harmony One? How can I open up the Logitech Harmony One remote control so that I can clean around the keys that are stuck with jelly?

With 
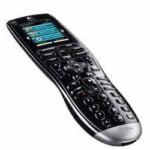
their constant use, it is not uncommon for the buttons on the remote control to become sticky with dirt, dust and food debris. The Logitech Harmony One is delicate and can easily become damaged if opened. We recommend that you clean the exterior as well as possible. If further cleaning is required, contact a professional to have it serviced.

While there are sites that offer instructions on dismantling the remote for cleaning, we have found this to be an unsuccessful cleaning routine. Unlike other remotes, this remote is fragile and was not designed to be taken apart. While some may have been able to put it back together, it often results in the screen not functioning, and it is also very difficult to re-attach the rubber grip without it looking horrible. Not only will taking the remote apart void any warranty, it will likely damage the device.

You Will Need:

  • Rubbing alcohol
  • Cotton swabs
  • Lint-free cloth
  • Toothpicks

Steps to Clean the Remote:

  1. First, remove the batteries from the remote and set them to the side. We don’t want any power running through the device while cleaning.
  2. Most gunk builds up around the buttons and in the seam between the two halves of the remote, so we’ll tackle that first.
  3. Take a toothpick and carefully scrape the edges around the buttons and along the seam to remove as much dirt and dust build up as possible.
  4. For sticky areas or really dirty areas, rubbing alcohol can be used.
  5. Dip a cotton swab in the rubbing alcohol and remove any excess liquid.
  6. Use the damp cotton swab to wipe around the buttons and along the seam. Switch to a fresh cotton swab as needed.
  7. Clean the back of the remote the same way, using a cloth instead of a swab if preferred.
  8. Once all of the dirt is removed, use a lint-free cloth to wipe down the entire case.
  9. Avoid adding moisture to the entire case as it can seep inside and cause damage.
  10. Brush away any dust or pieces of dirt that were removed from the buttons and wipe away any build up from the plastic.
  11. Use the lint-free cloth to clean the screen as well.
  12. Ensure there is no moisture in the remote from the rubbing alcohol before reinstalling the batteries.
  13. Once finished, reinstall the batteries and enjoy your clean remote.

Cleaning Guides, Electronics

Was This Guide Helpful?

+1.1B
-1073741816.5
Rating: 7669584504%. From 14 votes.
Please wait...

Related Posts

  • How to Clean a Remote Control
  • How to Clean The World
  • How to Clean Stuff
  • How to Clean Lycra
  • How to Clean Oilcloth
  • How to Clean Your DVD Drive

Lorem ipsum dolor sit amet, conse ctetuer adipiscing elit, sed diam.

Lorem ipsum dolor sit amet, consectetuer adipiscing elit sed diam.


Thank you for subscribing!

Reader Interactions

About the Author

Avatar photo

Susan

I'm a stay-at-home mom who used to run a small housecleaning business. These days I consider myself more or a mad cleaning-scientist. I do most of the testing for our articles - as well as helping Mark & Melanie write them.

Leave a reply Cancel reply

Helpful comments include feedback on the recipe or changes you made.

show comments +

Comments

  1. Nancy says

    February 18, 2019 at 6:14 pm

    How to clean the rubber part of the remote as it had become very sticky over time?

    Reply
    • Avatar photoMelanie says

      March 4, 2019 at 10:09 pm

      Hi Nancy,
      This is the article you need: How to Remove a Sticky Surface from Rubber. Good luck!

      Reply

Primary Sidebar

Featured Guides

How to Clean a Hairbrush

How to Clean a Microwave Oven With ZERO Chemicals

How to Clean Every Dental Retainer

How to Clean your Macbook’s Screen

Join our mailing list.
Be the first to know about new arrivals, sales, and special events.
Thank you for subscribing!

Footer

Browse by Category

  • Automotive
  • Clothing & Fabrics
  • Floors & Carpets
  • Housecleaning
  • Kitchen & Bath
  • Outdoors
  • People & Pets
  • Household Stuff

Contact

  • Ask Us Your Cleaning Questions
  • Contact Form

Follow us on Social Media

Site Information

  • Cookie Policy
  • Guest Post Policy
  • Accessibility Policy
  • Privacy Policy
  • Terms of Service
  • XML Sitemap

Copyright © 2023 · HowToCleanStuff.net · All Rights Reserved · Website by Anchored Design