Ravi asked: “How do I clean a laser printer? (Dell 3010cn)”
Cleaning your laser printer is a project that can easily be completed at home as long as you know the procedures and have the proper tools. Basic cleaning can and should be done regularly to extend the life of your printer and maintain printing quality. It is also wise to have your printer professionally serviced periodically for an in-depth cleanings.
Pre-Cleaning Considerations
When determining if you want to undertake the job of cleaning your printer, consider these points:
- Do I feel confident that I can complete the cleaning? Read through the steps below and if you feel that it is too difficult for your comfort level, do not hesitate to call a professional or take it to a service center. It is always better to ask for help if you are not sure.
- Will this affect my warranty? In some cases, performing your own maintenance to the printer will void the warranty. Review the warranty paperwork that came with your printer and/or contact the manufacturer to find out what your limitations are.
- Do I have the proper tools? Toner produces a fine, black dust that can be harmful if it gets into the lungs. The methods below allow for minimal toner to enter the air, however, it requires that you have proper tools. If you do not have the proper tools, either get them or have a professional service your printer. The U.S. Environmental Protection Agency offers additional information regarding health concerns related to toner.
Interior Cleaning of a Laser Printer
What You Will Need:
- Small, soft-bristled paint brush
- Toner vacuum (do NOT use a household vacuum)
- Several toner cloths (recommended) or a soft cloth
- Face mask that filters fine particles
- Isopropyl alcohol (99% pure)
- Compressed can of air
- Latex gloves
- Lint free cotton swabs or printer swabs (printer swabs have longer sticks to reach further spaces)
- Large sheets of paper/newspaper
The Cleaning Process:
- Begin by minimizing the amount of air movement in the room that could cause loose toner particles to become airborne. Turn off fans, air conditioners, etc. to keep the air in the room as still as possible.
- Place a fine particulate mask or respirator over your nose and mouth to prevent breathing in airborne toner particles.
- Use latex gloves to protect your hands.
- Cover your work area with the large sheets of paper.
- Unplug the printer and place it on top of the paper. Ensure that it has had sufficient time to cool down. The fuser-roller gets extremely hot while printing, so it is essential that you allow it to cool off completely to avoid burns. It is recommended that you allow the printer to sit unplugged for at least one hour before opening to clean.
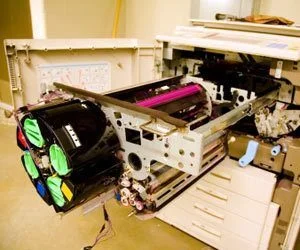
- Open the printer and carefully remove the toner cartridge or bottle to minimize toner spilling out.
- Activate your toner cloth by stretching the sides. These cloths are specially designed to attract toner particles and trap them so they do not become airborne.
- Use a toner cloth to wipe the exterior of the cartridge and lay the cartridge on a clean cloth.
- Use the vacuum to remove any spilled toner as well as any toner that is loose on the internal compartments. Toner vacuums are powerful, and should be kept away from the internal surfaces. Placing the nozzle near the surfaces without touching them will still allow for the strong suction to remove the loose toner. While household vacuums may be powerful enough to remove the toner particles, they do not have the proper filtration systems to keep the particles from re-entering the air. For this reason, it is important to use the toner vacuum which can be found online or at your local office supply store.
- Use the small, soft brush to gently brush loose particles from crevices and corners while vacuuming.
- There are thin wires called corona wires that will often be exposed during cleaning. These fine wires can be easily damaged and are costly to repair. Take extra precaution not to brush or vacuum these fine wires. Instead, use a cotton swab moistened with isopropyl alcohol to gently run along the length of the wire. No pressure is required to remove the fine particles.
- After the interior of the printer has been cleaned, simply reinsert the toner cartridge, close the cover and plug it back in.
- Run a test print page to ensure the printer is functioning and printing as normal.
Additional Tips and Advice
- There are laser printer cleaning kits available that contain the necessary supplies along with detailed instructions for cleaning the printer. This ensures that all of the materials are fit to be used inside of a printer and are made for your particular printer type. Check with the printer’s manufacturer or at your local office supply store for available kits.
- Avoid using the cloth inside of the printer as the many sharp corners and edges can tear some of the fibers. If they get stuck inside, they will cause additional problems.
- For a printer with normal use levels, it is typically sufficient to clean it every three months and have it professionally deep-cleaned once a year.
- To clean the exterior of the printer, simply wipe it down with a soft cloth slightly dampened with water. If any cleaners are used, ensure they are safe for plastic and do not get inside of the printer.


This article is nonsense. It looks like it is a DIY method. Then, it recommends everything possible to make it harder for a home user to do it. THEN, it says to do it every 3 months and THEN it says to have it done professionally once a year. This is an example of a nutty person just showing off his/her supposed expertise.