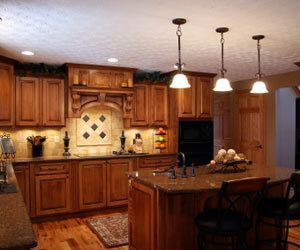
Linda asked: How do I clean the kitchen cabinets and woodwork? The kitchen cabinets and woodwork in our home are dark stained. They are in good shape but have a lot of build up dirt and in the kitchen, even grime that is a bit sticky. Our home is approximately 30 years old and the woodwork cleaning has been neglected for approximately 10 years. Everything is undamaged. Thanks for your help!
There is a lot of moisture that floats in the kitchen’s air contributing to the build up of dirt, grease and grime on cabinets. Even after years and years of build-up, it is still possible to remove the grime and get your cabinets and cupboards looking new again. Follow these guidelines to give your kitchen the spruce-up it deserves.
Removing Dirt Build Up
*This method is only for wood furniture that is stained, but not painted as it will damage and/or remove the paint.
You Will Need:
- Boiled linseed oil (do NOT use raw linseed oil)
- Turpentine
- White vinegar
- Soft cloths
- Old toothbrush
- Drop cloth, cardboard or other ground covering
- Rubber gloves
- Small disposable container
- Paint stir stick
- Face mask (optional)
- Paper towels
- Vacuum with attachments
Steps to Remove the Dirt Build Up:
- Start by selecting a work area that is very well ventilated. Working outdoors is the best place as this solution produces a strong smell that you don’t want lingering in your home.
- Prepare the work area by covering the ground with a protective covering such as a drop cloth, large sheets of cardboard, etc. Gather rubber gloves and a mask for yourself.
- Bring the wooden piece outdoors and begin by wiping the entire piece down with the paper cloths to remove as much of the grime as possible. After you have wiped it off, use the vacuum with the brush attachment to gently brush dirt from the crevices and corners.
- Next, mix together equal parts of the linseed oil, turpentine and white vinegar.
- Moisten the soft cloths lightly with the solution and gently wipe the dirt and grime off of the wood surface. As you are cleaning, wipe with the grain of the wood and take caution not to soak it.
- Continue cleaning with the cloths just until the dirt is gone, do not scrub too much or it may damage the finish.
- For corners, designs, etc., dip the old toothbrush into the solution and gently work it into the grooves. Follow the grain as much as possible just as before. Wipe away with a clean cloth.
- When no more dirt is showing on the cloths, discontinue any further applications. There is no need to rinse the wood.
- Allow the piece to dry completely.
- When the piece is completely dry, buff with a clean cloth to restore the shine.
- Dispose of any remaining cleaner as well as any cloths with cleaner on them using appropriate methods. They are combustible and may start a fire, so be sure to dispose of them promptly and properly.
Removing Grease Build Up
You Will Need:
- Baking soda
- White vinegar
- Murphy Oil Soap
- Sponges
- Soft cloths
- Buckets
- Water
- Spray bottle (optional)
- Wood conditioner
- Mild soap
- One of the following solvents:
- Turpentine or mineral spirits (safe for any finish)
- Denatured alcohol (for varnish and lacquer finishes)
- Do not use alcohol on any shellac finishes
Steps to Remove the Grease Build Up:
- Start by mixing 3 tablespoons baking soda with one cup of warm water.
- Use the sponge to spread the baking soda solution over the greasy area and gently rub to remove.
- Rinse with clean, cool water and dry with a clean, soft towel.
- If the grease remains, try applying vinegar to the area. It will help to break through the grease and allow for easier removal.
- When finished, rinse the entire area with plain, clean water to remove the vinegar.
- Repeat as necessary.
- If the baking soda or vinegar cannot cut through the grease, apply some Murphy Oil Soap. This soap is designed for wood and is safe on all surfaces. Apply following manufacturer’s directions and rinse.
- If the Murphy Oil Soap does not cut the grease, it may be necessary to try a solvent. Solvents are much stronger and have a danger of affecting the finish. Test a small, hidden area prior to using on the entire cabinet to ensure there is no damage to the finish.
- Apply the solvent with an old towel or rough cloth and scrub gently to remove.
- When the grease is removed, it will be necessary to clean the area with water and a mild soap to remove any residue from the solvent.
- Allow to dry and apply a wood conditioner to keep the wood from drying out.
Cleaning Hinges and Hardware
You Will Need:
- Mild detergent
- Water
- Toothbrush
- Baking soda
- Rubbing alcohol
- Vinegar
- Soft cloths
Steps to Clean the Hinges:
- Before you begin tackling the hinges, take inventory of how dirty they are. If the hinges are extremely dirty, consider taking off the doors and removing them to get a very thorough cleaning. Then, you can reinstall clean hinges and maintain them with simpler, more frequent cleanings.
- If the hinges are not in bad shape, it might be possible to get most of the dirt off while still keeping everything intact.
- Regardless of where you work, start with a mixture of mild soap and warm water.
- Use a toothbrush to gently scrub the soap and water on the dirt to loosen and remove it.
- Wipe with a clean cloth to remove the dirt and debris.
- Repeat as necessary.
- For sticky or gunky hinges, make a paste out of baking soda and water and apply to the hinges.
- Scrub with the toothbrush as before.
- When all of the grime is removed, wipe the hinges down with rubbing alcohol. This both disinfects them and shines them at the same time. Vinegar works well to shine chrome hinges.
- Polish hinges and reinstall the doors (if necessary).
- If you have removed the hinges completely, you can soak them in ammonia and water and then scrub them with the toothbrush for extra cleaning.
Additional Tips and Ideas
- Solvents require adequate ventilation. Open all windows to allow proper air flow during use.
- These same cleaning methods are effective for cleaning baseboards, molding, etc.
- Dawn is known for cutting through grease and can also be used on woodwork. Test a small area first to ensure that the finish on your cabinets is not affected.
- Consider applying a polish to the cabinets after cleaning to really make them shine!
- For painted cabinets, a mild soap and water is typically enough to remove the dirt and grime build-up.


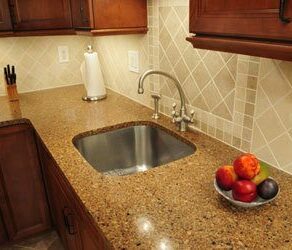

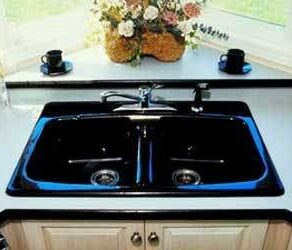


We had to reroute plumbing in the kitchen from inside to outside wall, therefore must move sink, dishwasher, and cabinets and countertops that go with them. We don’t have money for new cabinets, but realize we may need new countertops. How do we detach cabinets and move them without tearing them up? They’re cheap, stock cabinets put in by investors who flipped house before we bought it. Unsure if they are screwed and/or glued in. Thanks.
Rowwith
You suggest to polish them after cleaning them to give them a shine; may I ask what is a good polish to give them a great shine?
How do I clean dried on old sticky spatters covering upper wooden cabinet doors?? There are some grease spatters too.
I have tried flax soap with very warm water 5-6 times. Guardsman wood furniture cleaner (spray can) = no help.
Tried scraping the dry sticky spatters with a fingernail, it stays there.
Would applying tape to adhere to the stickiness work? What about steam?
I don’t want to ruin the shellac/lacquer finish.
What’s a good polish for cabinets after cleaning?
Quin,
You can make a spray with food-grade ingredients that works as both a cleaner and polish that it can be used regularly so you don’t have to clean and polish the cabinets seperately. Here is the recipe: DIY Wood Cleaner. For polishing, the important part is adding the oil, which is what will give the wood a nice shine.
There are many chemicals in commercial wood polishes (ex. Pledge Furniture Spray) that may not be ideal for use in a kitchen, so if you would prefer to use a commercial product, consider looking through EWG’s database to find one with a healthy rating.